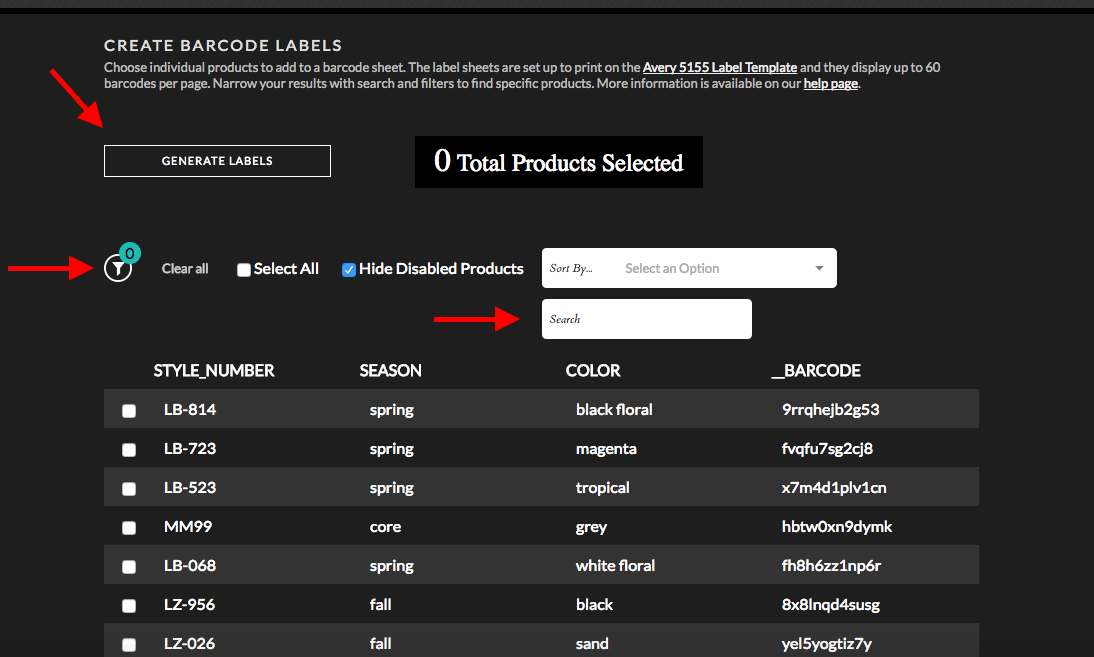
Generate and print barcodes directly from NuORDER.
Note: See Barcodes to learn more about using scanners and barcodes with NuORDER Mobile.
Set up barcodes
- From the left navigation menu, go to Settings > Brand Admin > Product Catalog Settings > Barcode Management.
- Assign a Barcode Title, Barcode Subtitle, and Barcode Field.
| Entry | Description |
|---|---|
| Barcode Title | The Barcode Title is the name that appears above each barcode label. You have the option to select a field name from the drop down. For example, style number could appear above each label. If you want a custom field from the product data, contact our Support team. |
| Barcode Subtitle | The Barcode Subtitle is an additional title that appears above the barcode. This can be selected from the dropdown menu. A custom field can also be applied here. |
| Barcode Field | For the Barcode Field, select a field that'll create the barcode number. If you use UPCs, they'll automatically scan as long as the UPCs are uploaded in the product data. This means that if you have barcodes that are from UPC values (and they're connected to product data in NuORDER), then they're scannable. Important note: It's not possible to generate barcodes based on UPC (or any other size-level) values in NuORDER. If you want your barcodes to be based on UPC values, then you'll need to generate your barcodes outside of NuORDER, as well as ensure UPC values are the same in NuORDER, so barcodes can scan and connect to the correct products. |
| Generated by NuORDER | If Generated by NuORDER is toggled on, you don't have to select a Barcode Field. NuORDER will generate a unique code for each style. |
Print barcodes
- From the left navigation menu, go to Settings > Brand Admin > Product Catalog Settings > Barcode Printing.
- Filter and choose the barcodes, and then select Generate Labels. You can search by style number to select barcodes individually. You can also use the filters to bulk select barcodes.

- When generated, you'll receive an email from which you can print the labels.
- Use Avery 5155 labels (2/3" x 1-3/4").
Before printing, make sure your paper size is set to A4 and not the standard letter size. If you need to set the page manually, the sizes should be the following: 8.27" x 11.69."
Make sure the Fit to page options are turned off. Set the media type to Labels, and then Print.