Linesheets are the core of any Virtual Selling appointment, as they allow you to pre-select the collection of Products you wish to showcase for your launch. Here are some best practices on how to set up your linesheets/catalogs to make them easy to use and to enhance their visual impact.
Hero images

When creating a new linesheet/catalog, uploading the hero image is as simple as locating the image file you wish to use on your local machine, and dragging it over to the grey cover image banner at the top of the blank linesheet page.

The banner image should be saved in RGB and must be in a .JPG or .PNG format. Images should be between 1600px-3200px in width and 400px-800px in height respectively. Hero images must be less than 900kb.
After you upload it, the hero image can be removed by selecting the red trash can icon that will appear in the top right corner once an image has ben applied. Alternatively, they can be replaced simply by dragging a new image to the banner containing the current image at any time.
Line separators

Line separators are the easiest way to compartmentalize groups of similar products, making the linesheet/catalog cleaner and easier to use.
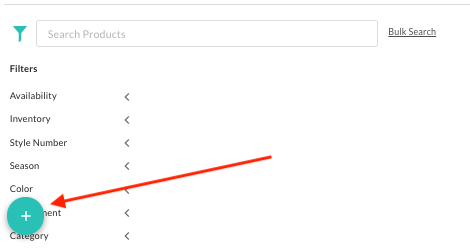
To add a line separator, start by expanding the Add items toolbar by selecting the circular + icon at the bottom left of the screen.

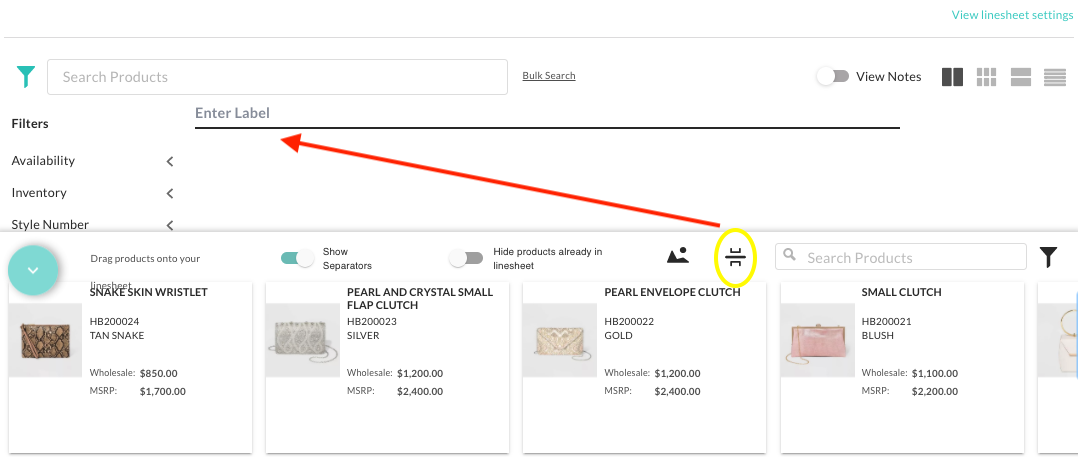
Then, find the Line separator icon located immediately to the left of the Search Products bar and drag it up to the appropriate position on your linesheet above.

Any custom text can be entered as the label for a Line separator, but as a best practice we recommend creating separators named for product data values that apply to multiple products in the launch. This could be any product data field, but separators are commonly based off of fields such as Category, Delivery, Department, Material, Fabrication, etc.
Merchandising tip
To make it easier to group products under Line separators, we recommend adding products to your linesheet/catalog in bulk by filtering for the appropriate values.
To do this, expand the + Add Items toolbar at the bottom of the screen, and expand the Filters icon at the top right of the Add Items toolbar. From here, filter out the products from your NuORDER product data that belong under the line separator.
In this example, the line separator is for all blazers in the Spring/Summer line, so you would filter by Season: spring/summer and Category: blazers.
When the resulting products are filtered down, it's as simple as checking the Select All box at the top right of the toolbar and then clicking the Bulk Add icon immediately to it's right, to bulk add the filtered products under the Line separator.

Then, create the next separator and repeat the process to easily bulk add products from the next category.

Product banners
Another way to enhance the visual impact of your line and draw the eye to particular products is by applying banners to particular items.

Banners can be set up in Teal, Black, or Grey from Settings > Brand Admin > Product & Catalog Settings > Product Banners.
When you have set up a new banner from this page, simply apply the Banner Text value you inputed to the Banners field in your NuORDER product data, and the banner will appear over the default product image automatically.

For additional reference on these topics, check out these Help Articles: